Showing posts with label Kids. Show all posts

Sunday, May 26, 2013

D.I.Y - Photo Sachets and Bean Bags

Instagram Sachets and Beanbags DIY Tutorial 10 via lilblueboo.com

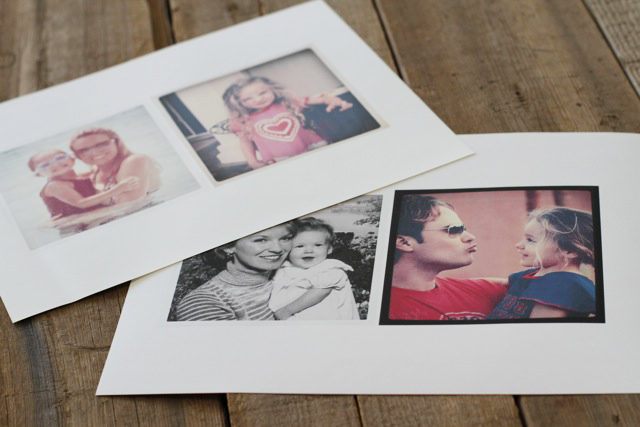
Print out 4.5″ x 4.5″ in size onto transfer paper.  
There are various types of transfer paper: use a light version for white and light colored fabrics and opaque transfer paper for dark colored fabrics.
Instagram Sachets and Beanbags DIY Tutorial 1 via lilblueboo.com

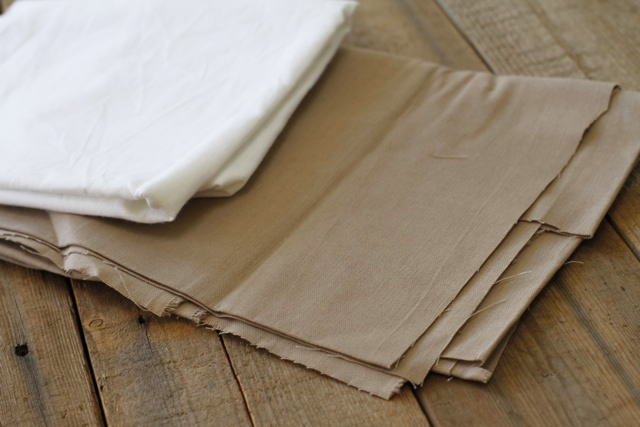
I used a white muslin fabric for the front of the bags and a beige linen-like fabric for the back:
Instagram Sachets and Beanbags DIY Tutorial 2 via lilblueboo.com

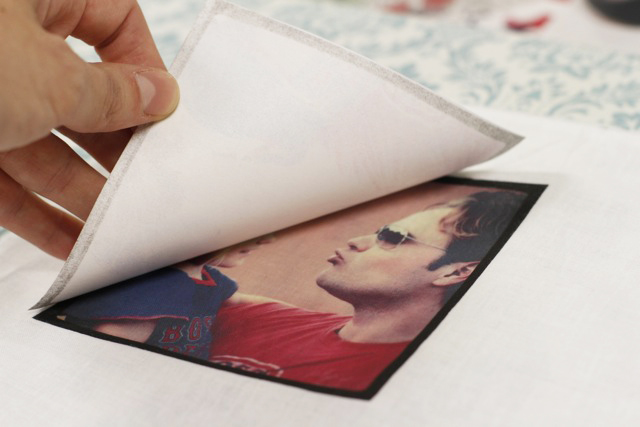
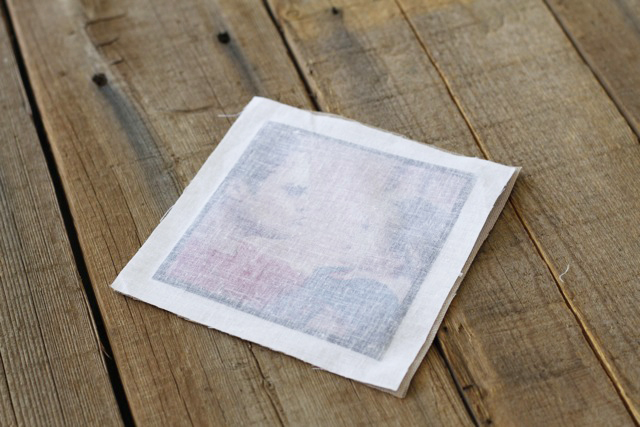
Follow the directions on your transfer paper (directions will vary by brand and kind) to iron the images onto the fabric you plan to use for the front of the bags:
Instagram Sachets and Beanbags DIY Tutorial 3 via lilblueboo.com

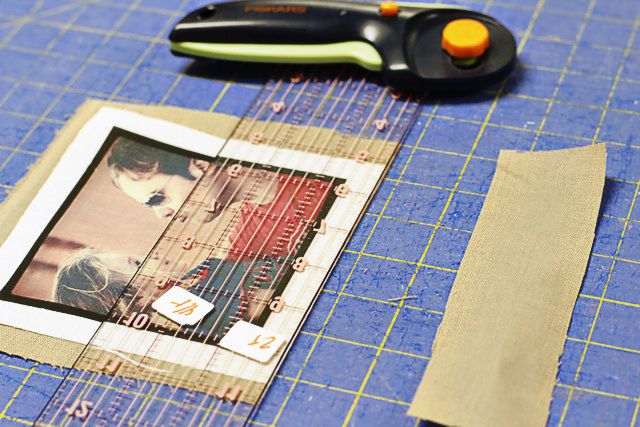
Use a ruler to trim the front piece leaving a 1/2″ border around the image.  You can trim the back piece at the same time.
Instagram Sachets and Beanbags DIY Tutorial 4 via lilblueboo.com

Place the front piece and back piece so that right sides are together:
Instagram Sachets and Beanbags DIY Tutorial 5 via lilblueboo.com

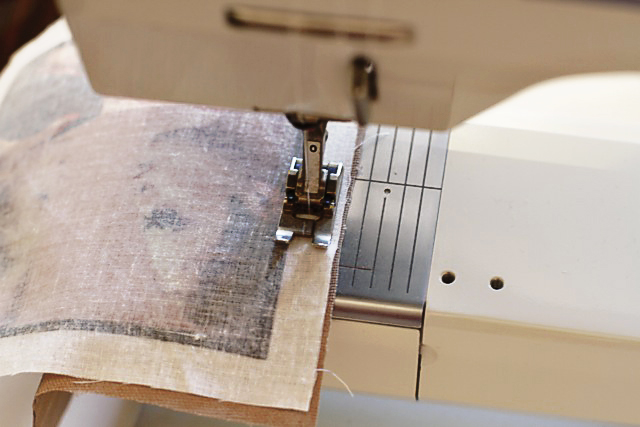
Starting at the side-bottom of the image,  sew all the way around the border leaving a 2″ opening so that the bag can be turned inside out:
Instagram Sachets and Beanbags DIY Tutorial 6 via lilblueboo.com

Turn the bag right side out and carefully iron flat if needed (when ironing make sure to use the protective paper included with your transfer paper if you used opaque kind):
Instagram Sachets and Beanbags DIY Tutorial 7 via lilblueboo.com

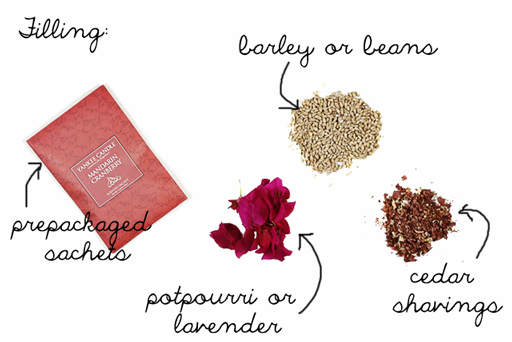
Take your pick of filling.
Instagram Sachets and Beanbags DIY Tutorial 8 via lilblueboo.com

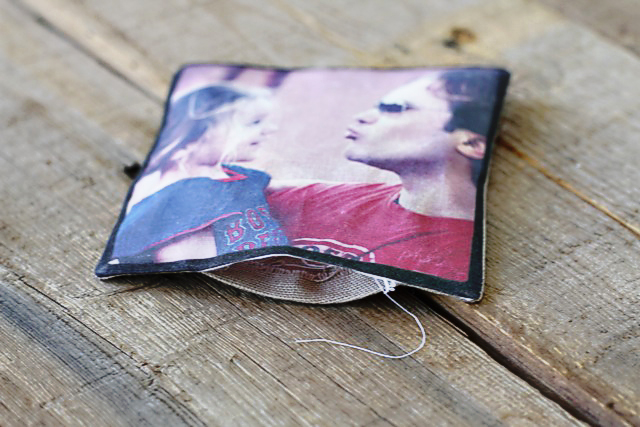
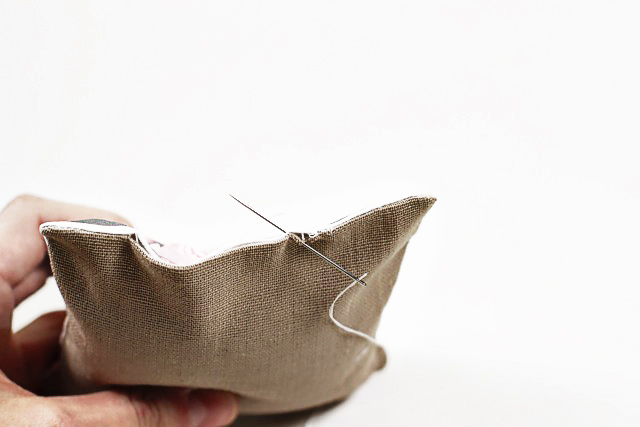
Carefully sew your bag shut with a hidden stitch:
Instagram Sachets and Beanbags DIY Tutorial 9 via lilblueboo.com

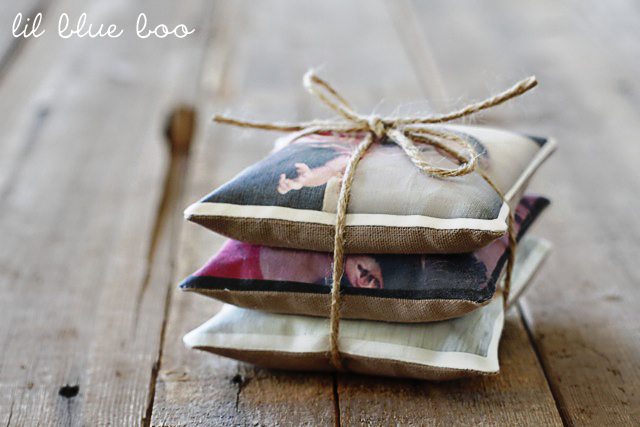
Finished!  Great filled with cedar for closets and sweater storage….or potpourri for a lingerie drawer.  Make one with the image of each family member on it for a young child to play with…..or maybe with travel photos for your coffee table to remember a trip.  Endless possibilities!

Use some twine to tie up the bags for a gift!
Instagram Sachets and Beanbags DIY Tutorial 11 via lilblueboo.com

Via: http://www.lilblueboo.com/2012/05/instagram-sachets-and-beanbags-a-tutorial.html

D.I.Y - Photo Blocks

Here’s how to make them:
You will need:
  • Square wooden blocks. Mine are approximately 4.5cm x 4.5cm. I purchased mine second-hand at Value Village. You can also buy them on Etsy.
  • Mod Podge
  •  Diamond Glaze
  • Acrylic Paint
  • Glue (Use one that is suited to photo paper)
  • paint brushes
  • Corner Punch, Rounder(optional)
  • Photo paper
Size your photos to 2 x 2 inches and print them on photo paper. Cut out each photo.
instagram craft
Use a corner punch to round the corners of your photo if you like this look.
instagram photosAdhere your photo to the block using photo-friendly glue.
photo blocks
Using acrylic paint, paint the edges of the block.
instagram photo
Using the dry brush technique (this requires removing most of the paint off of your brush), apply paint to edges of photo.
instagram blocks
Let dry. Coat photo with Mod Podge.
instagram blocks
Once Mod Podge is dry, apply a couple of drops of Diamond Glaze to the photo. Use a paint brush to coat the photo, as well as the edges. This will give a nice, glossy finish to your photo block.
photo blockinstagram photo blocks
Let dry. That’s it!
instagram photo
Via: http://www.intimateweddings.com/blog/diy-instagram-photo-blocks/

D.I.Y - How to make a simple tree house

How To Make a Gypsy Tree House
With the arrival of Spring, I decided it was time to bust out and build a tree house for Ursula, which I'd never done before. I remember having one as a kid and loving it. I wanted one that I could build in a day, wouldn't be too high up so as to worry me or other parents, and which was SIMPLE in design to maximize playtime and allow for adding on later. It's light, open and can go up and down easily.
How To Make a Gypsy Tree House
This tree house was built out of scrap wood and branches I had in our yard, and is a strong enough design not to require any more reinforcement than what you see here. It's also located at the start of our zip-line, which we put up last summer, and makes it a good place to climb up to and launch off from when needing to head out quickly across the yard. 
What You Need
Materials:
Circular or hand saw
Power drill with a philips screw bit
Level
6"-8" screws or nails (nails are stronger) for the frame
3" screws for the deck
2 - 6 foot 2"x6" pieces
2 - filler pieces of 2"x6"
8 - 4' decking pieces or 1"x6"
Small cut branch logs

Rugs, pillows and accessories to suit

Instructions
How To Make a Gypsy Tree House
1. Attach Foundation - Choose a tree that is strong, but not too thick and with branches that start a little higher up. With your two main pieces ready (undercut the ends to give it a more svelte appearance), attach one to the flattest part of the tree and then the other opposite. I did 6' from the ground, but lower would be better for smaller children (Ursula is 6 yrs old). 

Use only one screw in each so that you can adjust them to get them level with one another before putting in four more screws. It's easier and better to use a level, but I didn't have one and just eyed it. 

How To Make a Gypsy Tree House
2. Insert Cross Braces - This design is pretty minimal and not meant to carry big people, but I was surprised with how strong it was after sinking ten screws in the sides and then putting the cross brace pieces in as well. After you measure the width, cut two cross braces and slide them in between your foundation pieces. Then screw into tree (5 screws) as well as into the foundation (2 screws). Now you have a sold box going around the tree to hold your platform up and steady. 

How To Make a Gypsy Tree House3. Lay Deck - After cutting your deck pieces to 4' lengths, space them out evenly on top and screw in. I chose to use less pieces and leave gaps in the floor because  I thought it would remain cleaner and be lighter. I also think it looks better visually and is less likely to become an eyesore. This is a simple tree house after all, which in my mind means light, quick and more natural. 

4. Add Extra Deck - It's up to you, but we chose to add a few more pieces of decking to make it easier to move around the tree. While the gap on the other side of the tree serves as an entrance, this side connects the back room to the front room. 

How To Make a Gypsy Tree House
5. Install Staircase - Using small logs from a recently cut down tree, I screwed the steps in running up the tree, using a bunch of screws from left to right, as these get a lot of pressure on them. The nice, round surface is ideal for bare feet, and not using lumber softens it visually as well. 

6. Decorate - Colorful throw rugs are ideal for covering your deck, but this is where Ursula really took over. After sweeping all of her floors, and hauling up rugs, blankets, pillows and an old phone, she began nesting right away. :)


Via: http://www.apartmenttherapy.com/how-to-make-a-simple-tree-house-apartment-therapy-tutorials-186867

D.I.Y - Simple PVC Water Gun


PVC water gun
Easy PVC Water Gun
Here is another summer fun project to make with and for your kids: a PVC water gun.
What you will need:
24″ piece of 1″ thin-walled PVC
24″ piece of 3/4″ PVC
3/4″ end cap
1″ to 1/2″ reducer
1/2″ to 1/4″ nylon barb
PVC primer and glue
Strip of tire rubber
Sand paper
Contact cement

simple water gun


Get all your pieces together. Glue the end cap onto the 3/4″ PVC pipe. Glue the reducer to one end of the 1″ PVC. Screw the nylon barb into the 1/2″ side of the reducer. This is the tip of your water gun.

To make a plunger out of your 3/4″ pipe, sand the open side, then sand a strip of inner tube rubber to fit around the pipe (click on the drawing to see the details). Brush contact cement on the pipe and on the strip of rubber and let dry for 10 minutes. Glue the strip of rubber snuggly around the pipe and hold for a couple minutes. Glue a circle of rubber in the same way to the tip of the PVC (optional. You can also stop it up with some plummer’s epoxy. But you don’t really need to close the end of the 3/4″ pipe).

Lubricate the rubber part of the plunger and the inside of the 1″ PVC. I used some vaseline jelly on the rubber strip and also sprayed WD40 on the inside of the 1″ pipe. The plunger needs to move freely (but snuggly) inside the water gun.
To use the water gun, push the plunger all the way in, insert the tip in water, pull the plunger slowly out until the gun is full of water, and SQUIRT!


Via: http://www.diypics.com/simple-pvc-water-gun/

13 Ways to Sneak Learning Into Summer Fun


1. Try simple science experiments. An oldie, but a goodie, the baking-soda volcano is a tried and true way to spark fun and creativity during the summer months. When I looked up the instructions, I was shocked at how easy it is. To my surprise, there are countless fun and simple experiments that families can do at home, even without a background in science.


2. Create a family newsletter. Enlist your kids to choose a template from your computer’s office suite. Older kids will be able to quickly learn their way around the program. Younger kids can help take photos and write stories about family adventures, vacations and fun times at home. They can dictate their summer memories to a parent or older sibling. Include a favorite summer recipe. Send your newsletter to family members and friends.


3. Find a pen pal. Celia wants a pen pal so badly she can’t stand it. Her school friend is moving to another state, so we’ll try to arrange a correspondence with her. Celia also has cousins scattered about, but she wants a new friend, preferably in her favorite country, France, so I’m planning to check out pen pal programs such as International Pen Friends. Yes, I’ll monitor her pen pal friendships closely!


4. Make up silly stories. Remember Mad Libs? You can create your own fill-in-the-blank stories. Don’t overthink, just start writing. “Every time we pass by the big house on the corner, we think about the time our pet (animal), (name of favorite teacher), got loose in the neighborhood and ended up eating (favorite food) out of (favorite neighbor)’s refrigerator.”


5. Record your own audiobooks. Let your child read her favorite book while you record it. Save the recording on your computer, and let her listen to her story when she craves down time. If you have several kids, assign each a character.


6. Create your own book series. Start by brainstorming ideas for a character and setting. Then think about what will make your character special. Maybe he or she is an amateur detective or obsessed with baking cupcakes. Older kids can write their stories on the computer, and younger kids can dictate to a parent or an older sibling.


7. Experiment with different art media. Play with different types of paint, from watercolor to oil-based (wear a smock!). Make your own paint. Check out pastels, colored pencils, charcoal and other art supplies. Help your kids discover their favorite ways to express their creativity. Encourage them to make mixed-media masterpieces.


8. Play restaurant. Gather some takeout menus and a play cash register. One child places an order, and the other tallies up the bill. Make your own menu, featuring your kitchen specialties. When a parent returns home from work, let the parent order off the menu.


9. Use word magnets to make sentences. Write words on magnetic tape, or get premade magnetic words. Let your child use a cookie sheet to rearrange the words to make sentences. Challenge your child to make longer and longer sentences.


10. Do laundry together. Crazy but true, laundry is educational! Preschoolers can help you sort laundry by color, find matching socks and count towels and washcloths.


11. Study a foreign language. A whiteboard is as much a summer essential as a beach towel. Every morning, write a word of the day in a favorite language – my child is crazy about French – and use the word all day long. Try working your word of the day into regular conversation and making up silly sentences.


12. Make a reading scrapbook. After reading a fantastic book, encourage your child to draw pictures about the story. Your child can also make up an alternate ending, write a sequel and create a timeline. Keep the book notes in a folder and turn them into a reading scrapbook at the end of the summer.


13. Do jigsaw puzzles together. It may seem old school, but jigsaw puzzles are a great activity for summer downtime. We take puzzles on vacation and work on them in the afternoon when it’s too hot to go to the beach. The best puzzles have crisp, detailed pictures without swaths of solid colors.

Via: http://www.pbs.org/parents/summer/13-ways-to-sneak-learning-into-summer-fun/